The objective is to identify the earliest detectable fire-related signal in the satellite scene using spectral indices.
This analysis does not determine the cause or exact ignition point of the wildfire. It only evaluates spatial patterns of fire-related spectral signals at the time of satellite acquisition.
Data source and processing
- Satellite: Sentinel-2 L2A (Copernicus Data Space Ecosystem)
- Sensor: MSI (Multispectral Instrument)
- Resolution: 10 m (bands resampled where needed)
- Processing: OpenEO Python workflow
- Area: 2 km by 2 km region over Monte Faeta
All spectral bands were resampled to a common 10 m grid before index calculation.
All imagery and derived products are based on Copernicus Sentinel-2 data provided by the European Space Agency (ESA) through the Copernicus Data Space Ecosystem. © European Union / ESA, contains modified Copernicus Sentinel data (2026). 1
True colour image
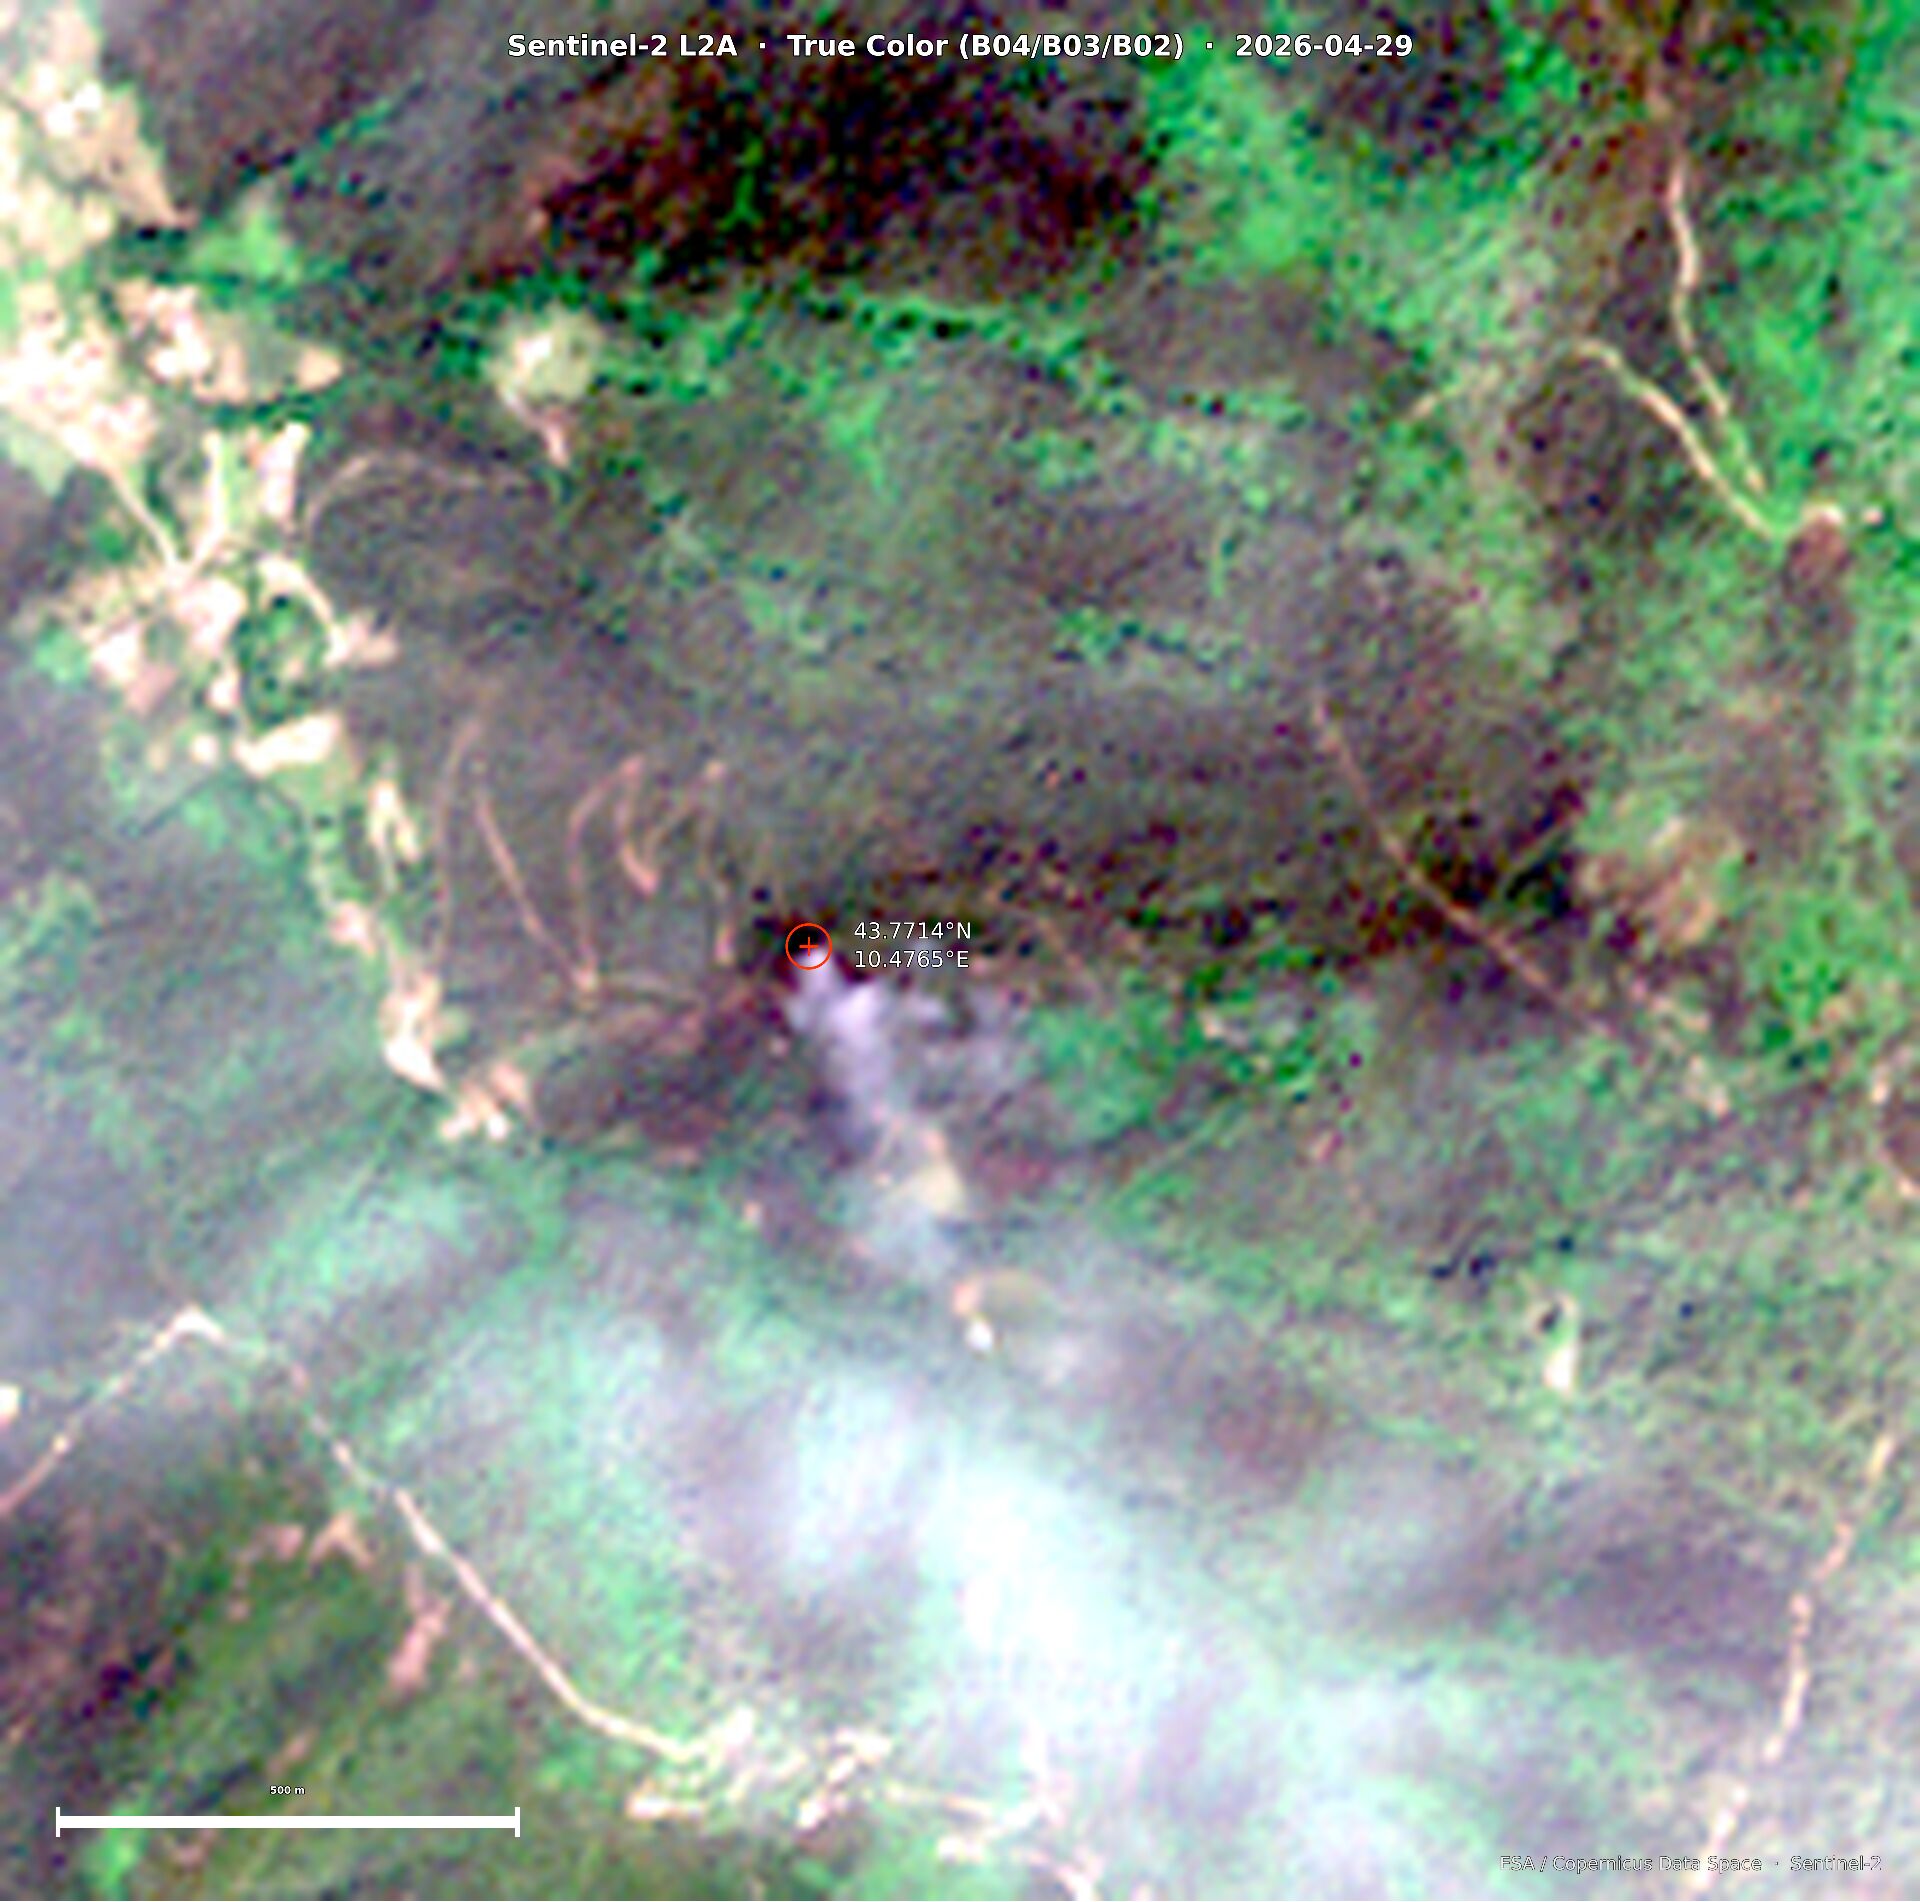
Figure 1: True colour composite (B04, B03, B02). 1
The true colour composite shows vegetation, smoke presence, and surface disturbance. Active fire is not clearly visible due to atmospheric effects and band sensitivity.
SWIR response
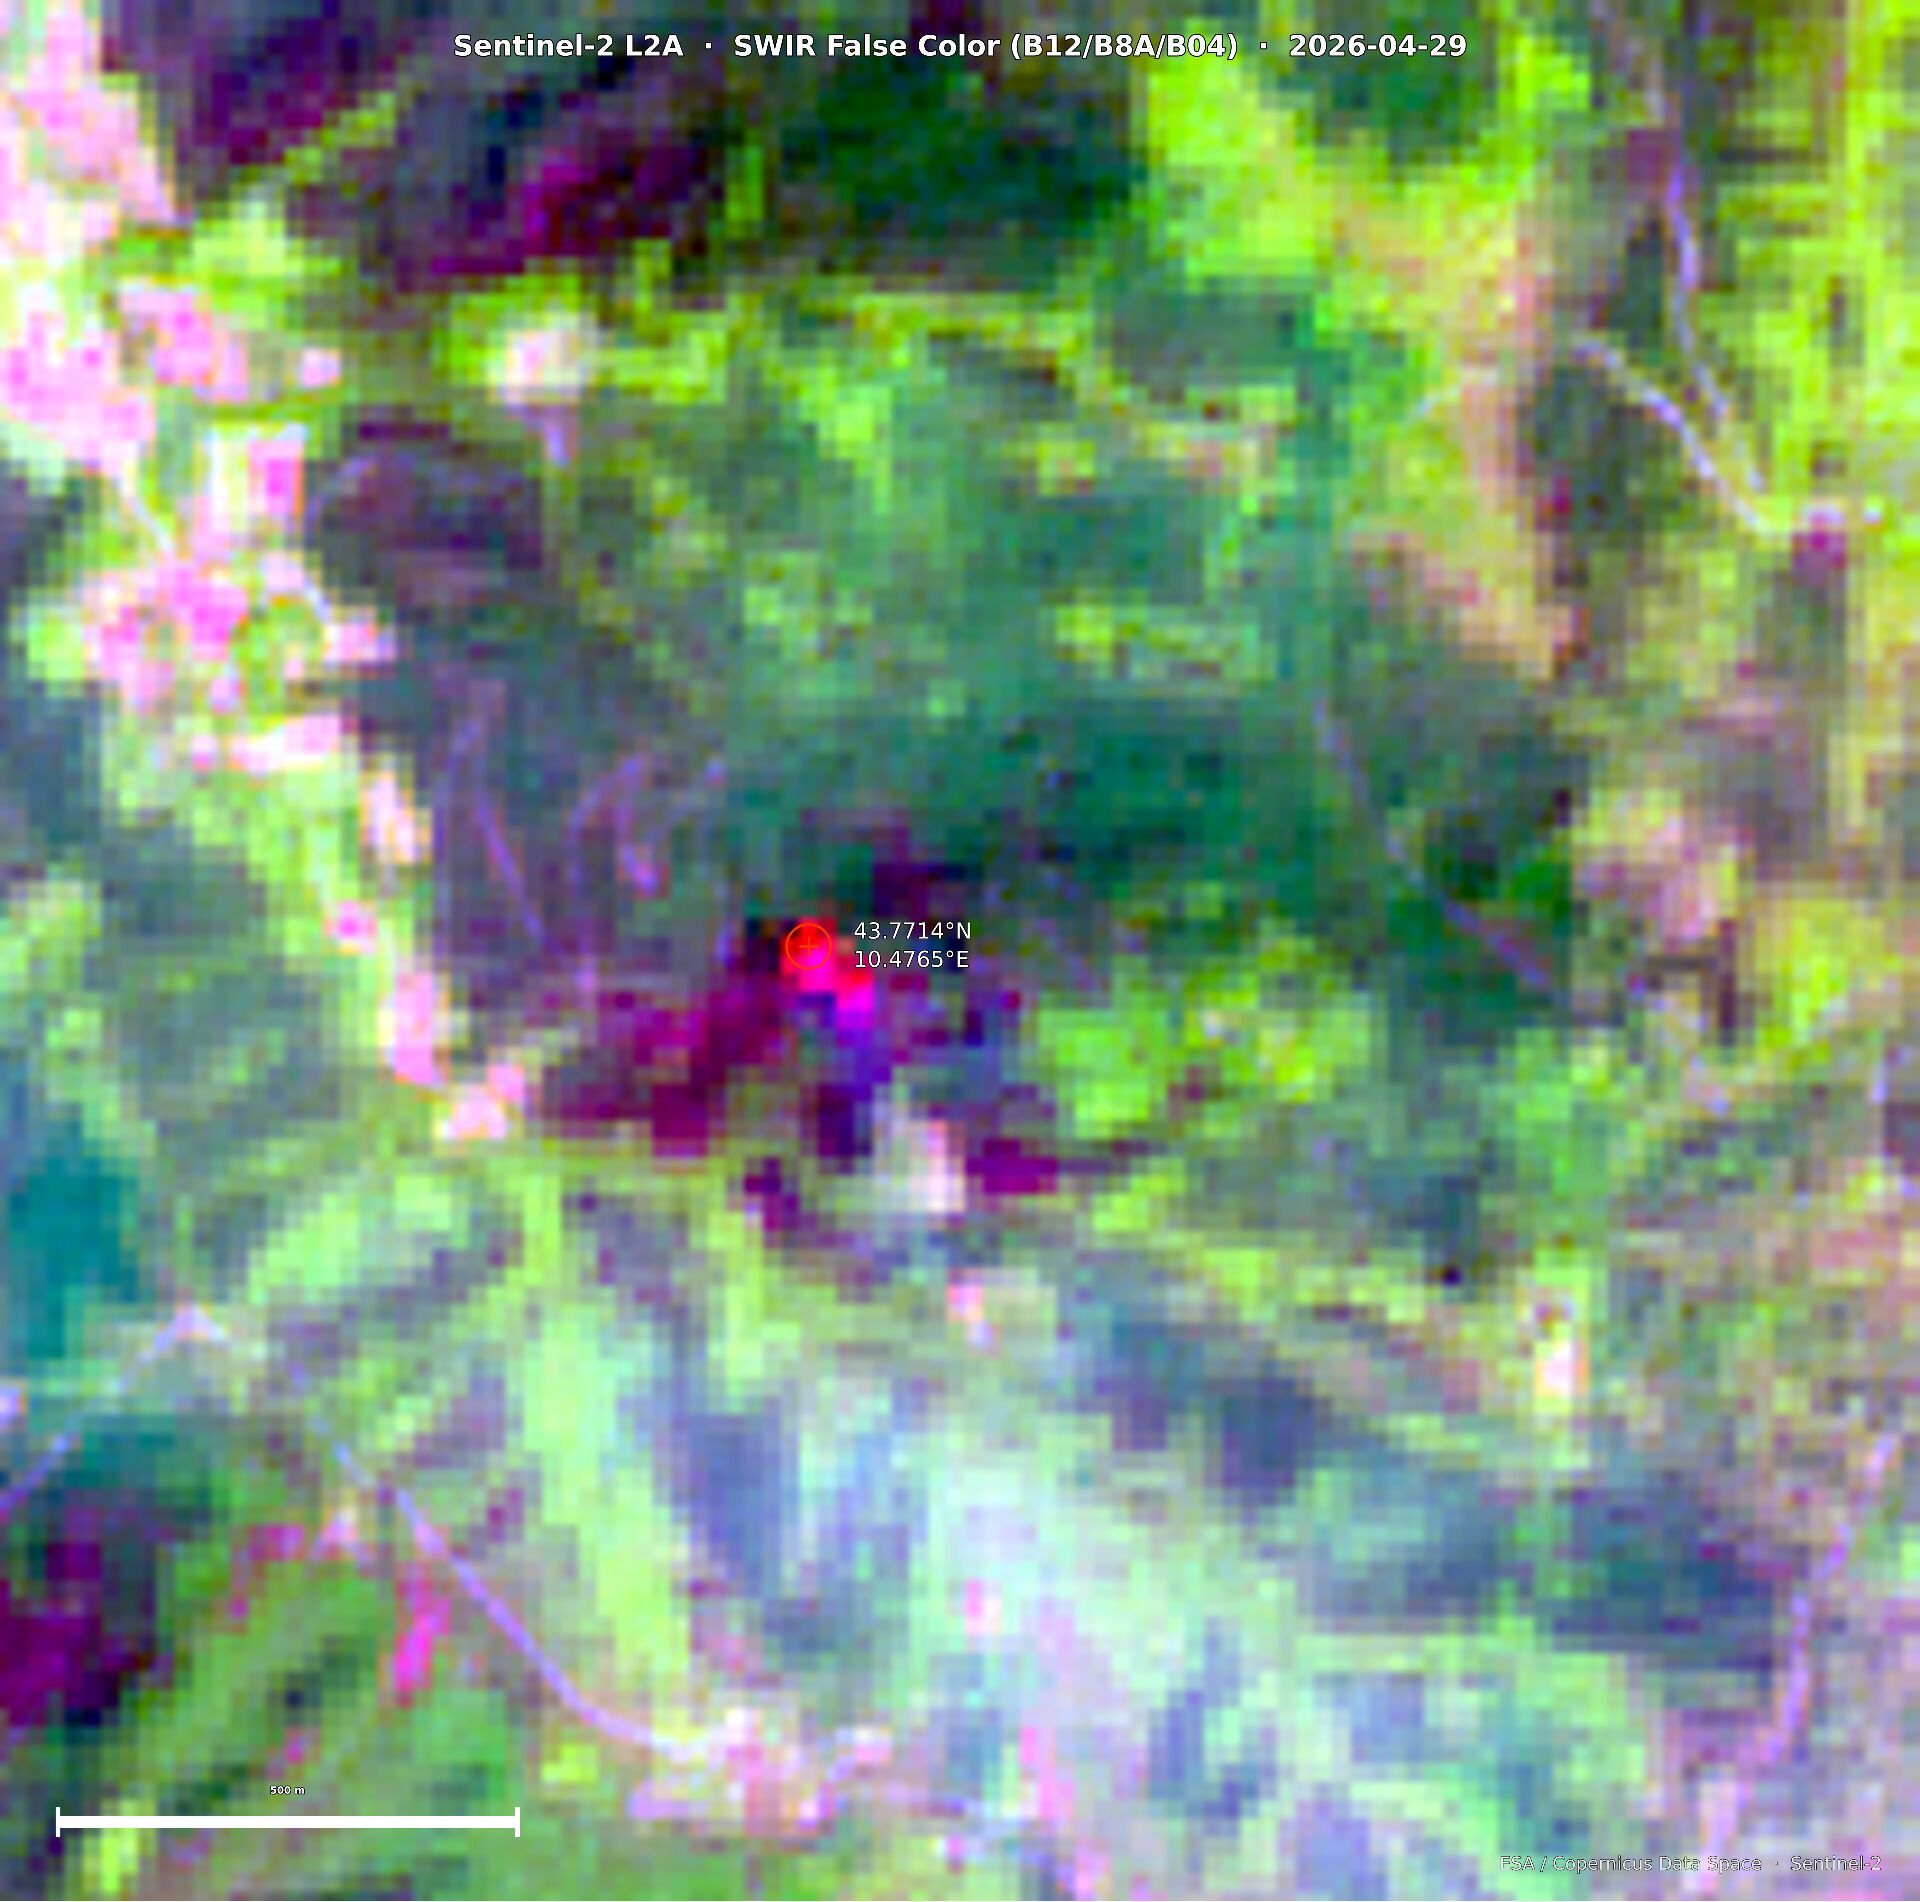
Figure 2: SWIR composite highlighting thermal disturbance. 1
Shortwave infrared bands (especially B12) are sensitive to high temperature surfaces and burned vegetation.
Elevated SWIR reflectance in the study area indicates fire-related thermal disturbance or recent burning.
Burn detection index
The Normalized Burn Ratio (NBR) is used to detect burned or fire-affected vegetation:
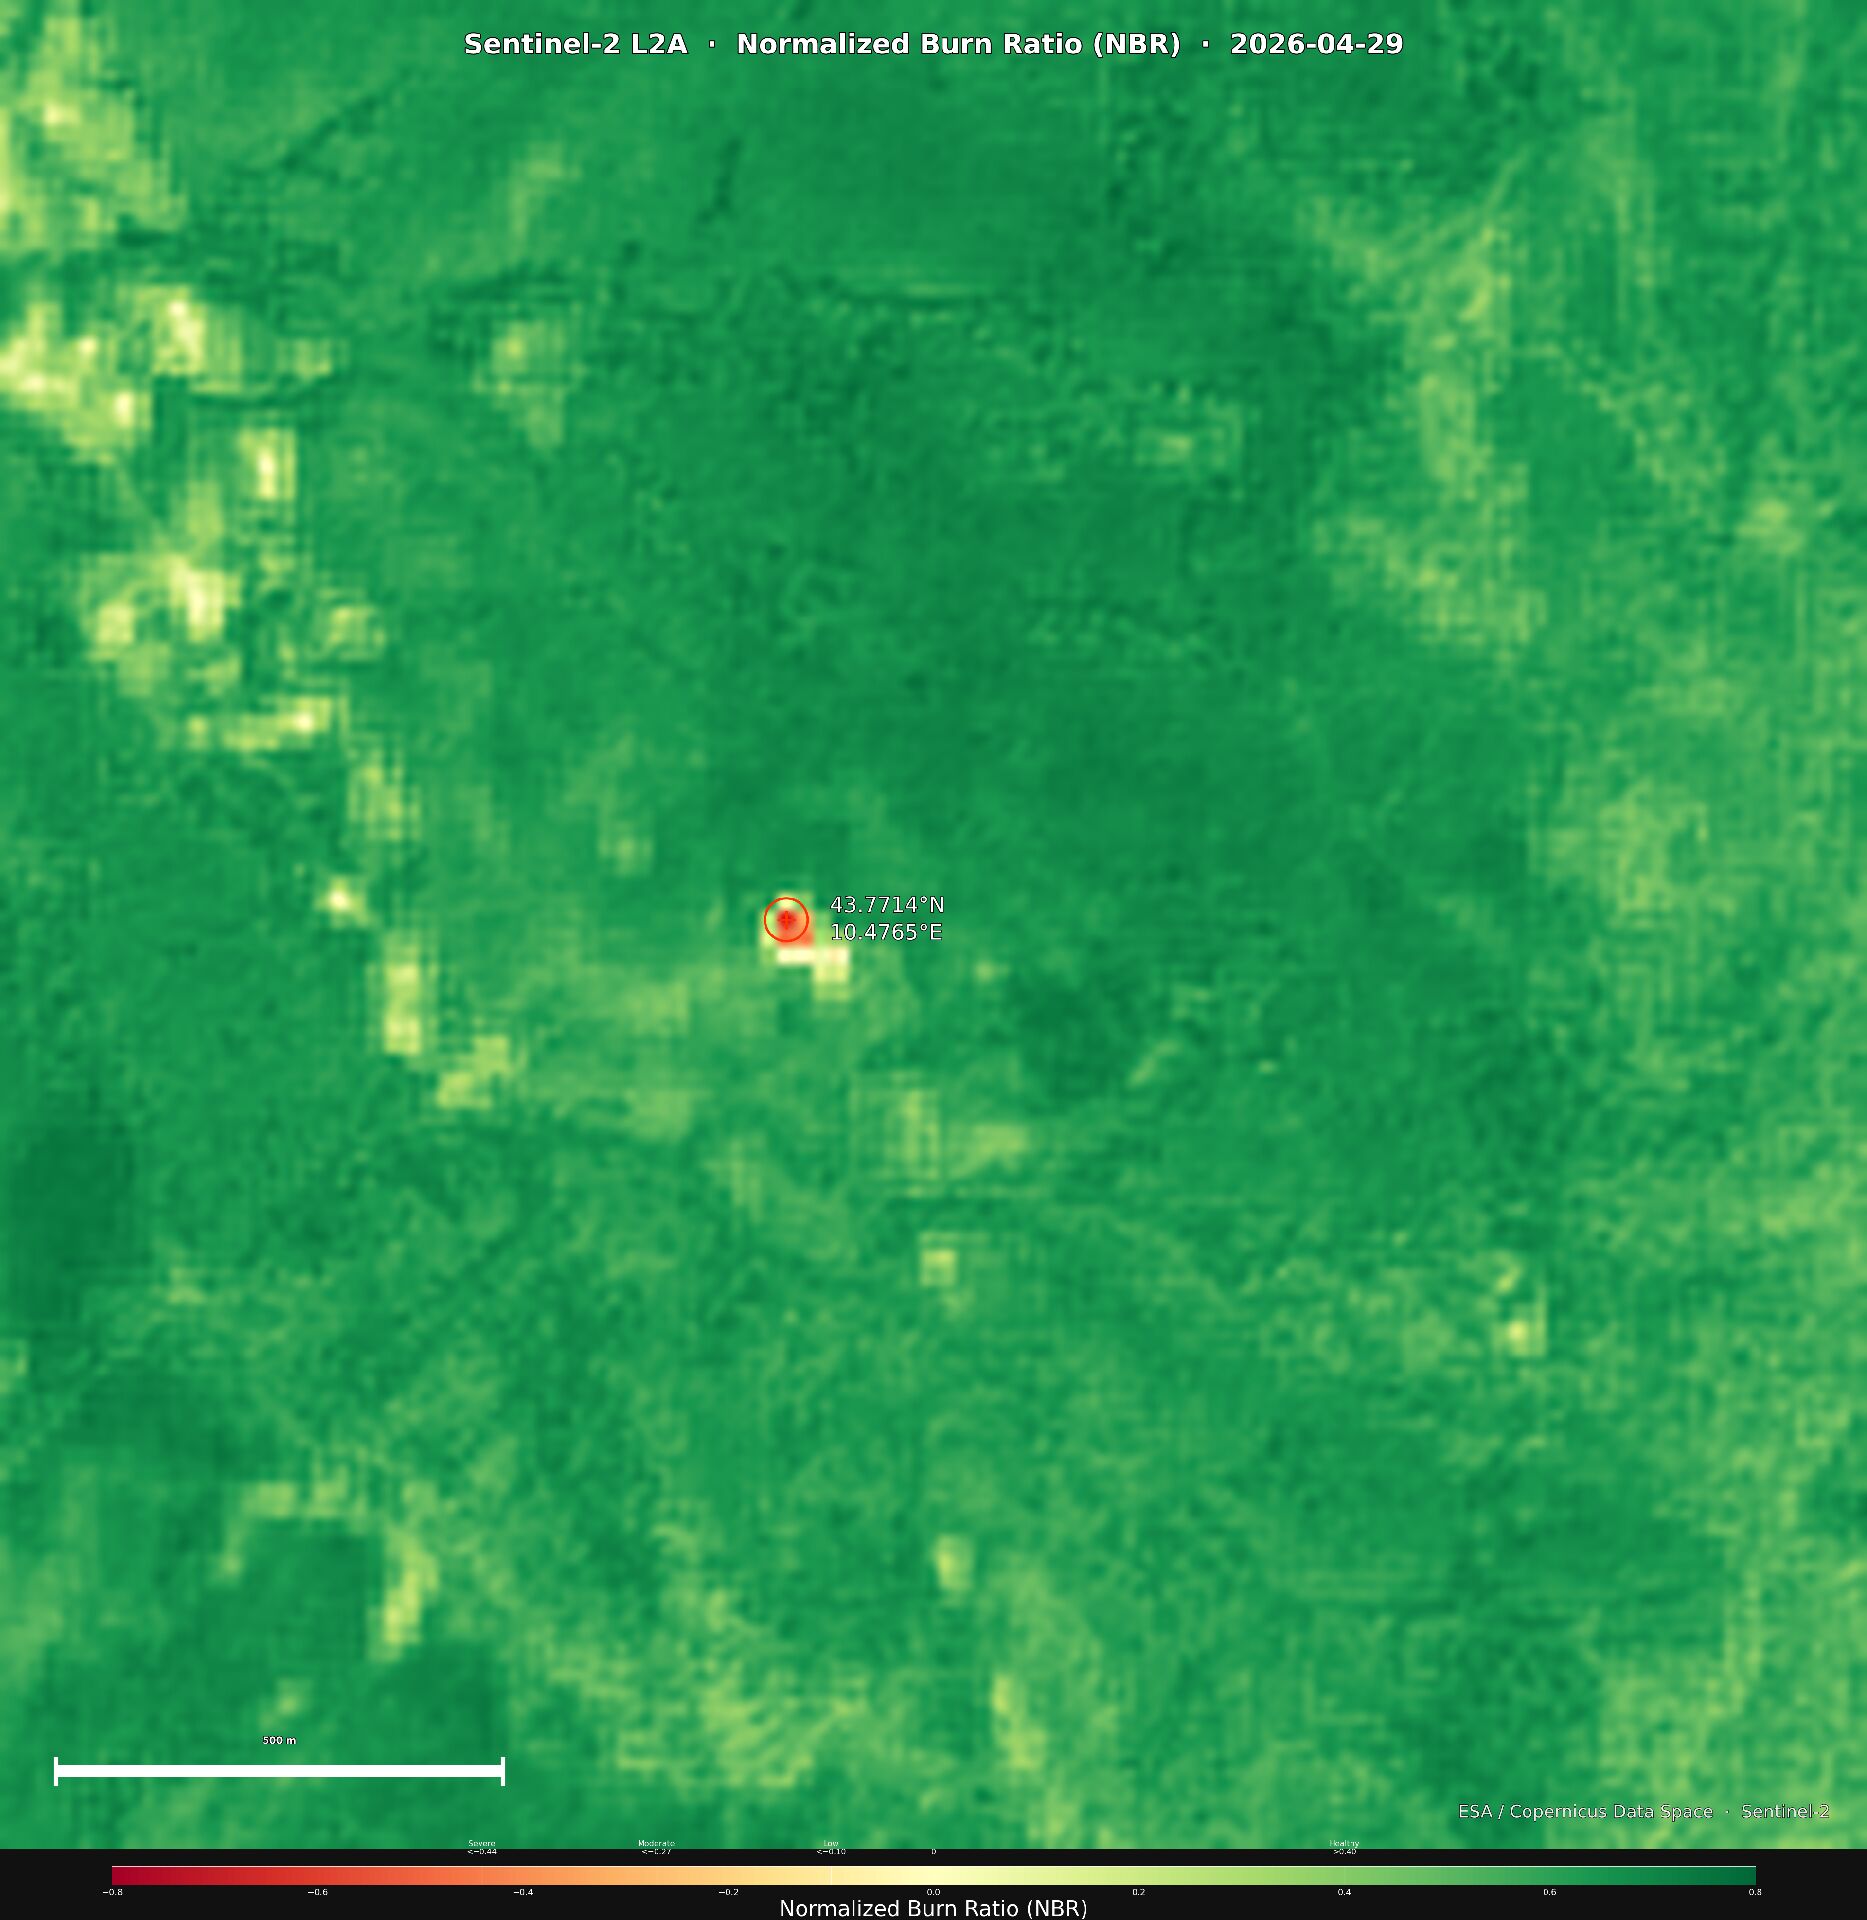
Figure 3: Normalized Burn Ratio (NBR). 1
Lower values of NBR indicate burned or heat-affected surfaces.
Earliest detected fire signal
A single pixel shows the strongest and most consistent fire-related spectral response in the scene.
Location: 43.7714°N, 10.4765°E
Spatial resolution: 10 m (Sentinel-2 MSI)
At this location:
- SWIR reflectance is elevated, consistent with thermal disturbance
- NBR is strongly negative, consistent with burned vegetation
- MIRBI is positive, consistent with fire-related surface conditions
These indicators are spatially aligned within the same pixel.
Interpretation
This pixel represents:
The earliest detectable fire-related signal in the Sentinel-2 observation of this area.
This does not indicate the ignition point.
Limitations:
- Sentinel-2 does not measure temperature directly
- Each pixel represents a mixed 10 m ground area
- Fire spread dynamics can shift peak signal location
- Only a single satellite overpass is available
Conclusion
Within the analysed Sentinel-2 scene:
- One pixel shows a consistent and strong fire-related spectral signature
- Multiple independent indices agree on this location
- This pixel is the highest-confidence fire signal in the dataset
Therefore, it is the earliest detectable fire signal at satellite resolution in this image.
]]>
/firefox-beta-bug-1919721.webp)